Ok, das Projekt ist nicht neu sondern auch ein verschwundenes POTF2.com Topic. Dies war das Build Topic des ESB Boba Fett Kostuems/Replica. Vielleicht zu schade um es verschwunden zu lassen. Vielleicht nicht. Das entscheidet der Leser. Versuche auch dies nach und nach wieder zu beleben. Allerdings schreibe ich hier nun in der Vergangenheit. Das Urtopic war ein sich nach und nach entwickelndes Topic, aber da das Kostuem/Replik mehr oder weniger fertig ist (ein Fett wird nie so ganz fertig, da immer noch was neues entdeckt werden kann)halt nun geschrieben in der Vergangenheit. Das verschwundene Topic endete mit dem fertigen Produkt, hier nun beginne ich mit dem fertigen Produkt und erzaehle den Aufbau, rekonstruiert aus den damaligen Infos.
Helmet: early 90�s copy of movie used helmet, fiberglass Visor: dark green tinted welding shield Rangefinder: terminal fettler Polaroid SX-70 view finder: (found part),movie scene negative mounted behind LED's self made circuit board, activates when stalk goes down Aluminium Stalk: Bkbt Borden Connector (found part) R/C Stalk mechanism: high quality servo, and remote parts from 1/24 scale modelcar Visible Circuit Board / Back Vents: real Casio MQ-1 (found part) Chin cup and strap: British police riot helmet from the 80�s(found part) Paintwork and assembly: myself
Body Armor: Chest, Backplate, Cod, Knees, Collar, vacuumformed, fettpride Chest circuit board: shackman Decals: Bobamaker Hardware to mount collar and cod: computer keys Gauntlets: Man of war studios version (resin and vacuumformed plastic,version 2?) Switches on right gauntlet: alco/Tyco (found part, working) Hose on right gauntlet: Generic plastic hose with correct webbing Darts on right gauntlet: Michell engineering turntable parts (found part) Micro Mega Dentist files (found part) Left Gauntlet: calculator pad, real Casio MQ-1 (working) (found part) Aluminium Missile: Russrep Aluminum and metal Flame Thrower (myself) glenross screw: resin copy, will upgrade to found part, if and when I find one. Aluminium Knee darts: DeanO Shin Tools: Paterson Squeegee and Stirrer (found parts), Shure microphone Paintwork and assembly: myself
Cloth part of costume: Suit, ammo belt pouches and vest, Bobamaker Gloves: myself, made from parade gloves, dyed and sewn Real Horsehair wookie braids: Julie Gray Balaclava similar(but not dead on) to the one used in the movies. Neckseal:TK409 Cape: TK409 Leather ammo Belt: 99cent Taco Horsegirthbelt: unknown manufacturer, doesn�t have the sewn middle connection like most others use. Movie costume didn�t have middle connection, dyed by me Boba's sound installed through mp3 player on continous loop and voice amplifier Strips to connect both ends of girth: black leather, myself Boots: CA Boots Toe Spikes: fenixprops Weathering and assembly: myself
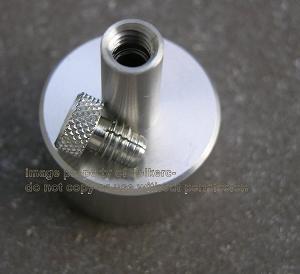
Jetpack: Man of war studios version (?), (signed on during the Jeremy Bulloch project run(2?3?)) Micro Mega dentist file (found part) Aluminium Beacon: Serenity, light, myself, high power bulb Aluminium stabilizer: Michell engineering U.K. sweep arm (found part) Aluminum thruster caps: fenixprops Paint and assembly: myself Buckle: U.S. Divers belt buckle (found part) Jetpack harness: selfmade from steel, welded like the one used in the movies, Webbing from divers pack Paint: outside waterproof and scratch resistant paint, all colors used mixed from basic Ral colors myself to match up with the real deal. Flat appearance., not semigloss. Thinned to use with airbrush.
Weapons:Blastech EE-3: real 1916 Webley No1 Mark I, flaregun(found part), deactivated to comply with the law for easy storage and to carry around. Scope: 4x20 Webley from the same manufacturer in Japan as used on the real costume. Scope mounts: metal, welded and made by me as close to the real used ones as possible. Leather string: real old wwII machine gun leather string, aged perfectly by itself to match, knotted like the real thing. String was as old when ESB was made and is now as old as it would be 30 years later. Stock greeblies: am/fm u.k. connectors from the 70�s (found part) Center Stock greeblie: Unimax switch (found part) Real Molex connectors: V8 piston rods: Revell (found part) Flashtube: MPP flashtube (found part) Barrel Laser: made from different parts, working, trigger operated Sidearm: real Pulce 40 (found part) Holster: Nemrod (found part) Paint, assembly, weathering: myself and the times�
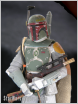
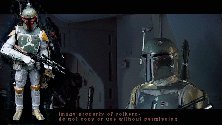
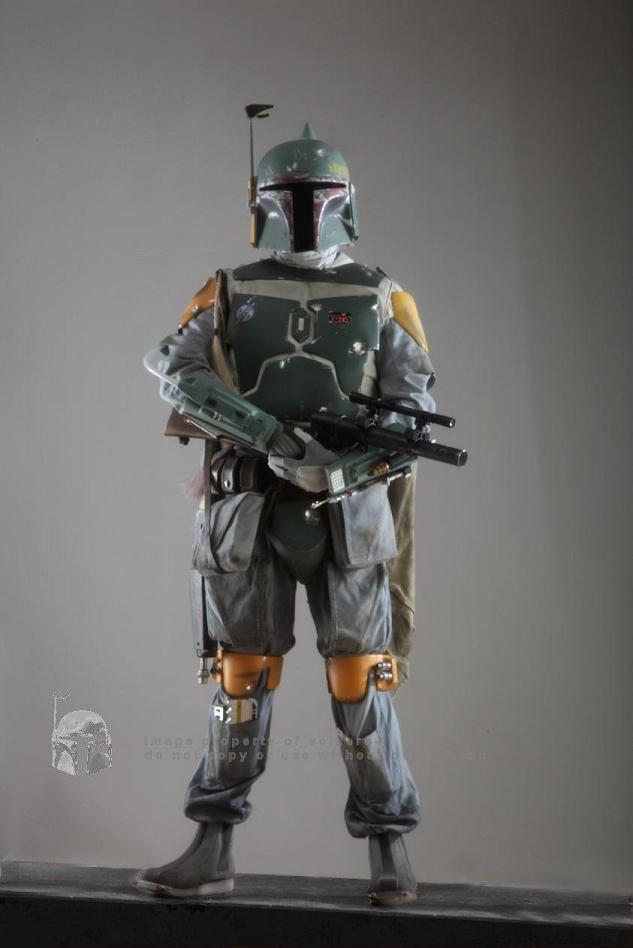
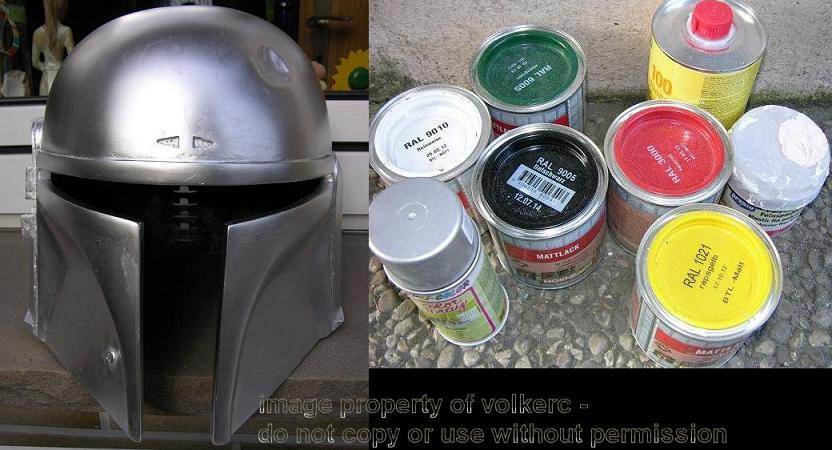
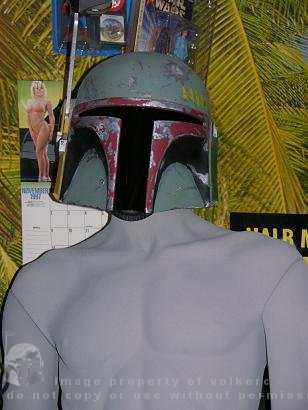
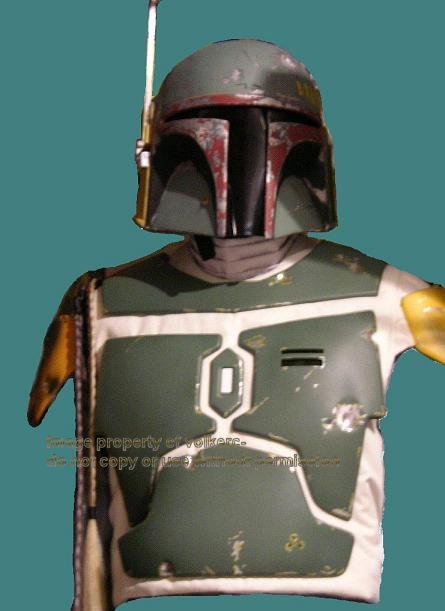
Foto wurde einem meiner Lieblings Screen Shots nachgestellt. Dafuer wurde ein Profifotograf bestellt um das moeglichst gleiche Licht zu erzielen wie im Film.
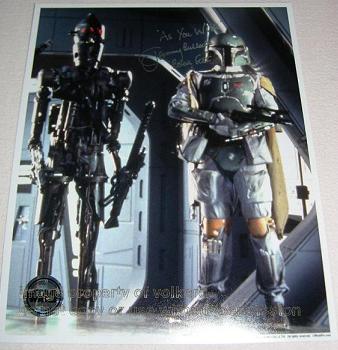
How it all began: It's not a secret I'm a Fett Fan. Fett stuff is a focus in my collection. One day I thought wouldn't it be cool to add a helmet to the collection? Place it in a cabinet and look at it everyday? So I searched the net, came across The dented helmet site, read up on what to look for and then kept searching ebay and other sites, propmakers. Now there is a lot of crap out there, and the TDH warned not to buy from one particular seller, which name I leave out here. So one day I came across this auction pic in this post and said to myself there is something special about this look of the helmet. And with the auction ending in the middle of the night over here, I thought ok i place an amount of x and see what happens. Thinking I would for sure outbid as usual I went to sleep. When I woke up in the morning I couldn't believe my eyes, I was the only bidder and won this item for chump change. When it arrived at the door I was so excited, opened the box and was not to happy about the what i thought at that time poor casting. Dents, holes, straightness, so I thought lot's of work to get it to look right. Boy was I wrong in my initial thoughts. I also wondered why nobody else had placed a bit, then it struck me. The sellers name sounded like the one to avoid. Good for me moneywise, bad for me later on,... I went to work on it tried filling the holes and scratches, something that later bit me... While filling and sanding I continued to read on the web about the helmets, and I came across the "Lava helmet". That helmet was pulled from an original helmet and was to be the most exact helmet at that time. I compared the dents, scratches, and so on to my helmets condition after I started to work on it and my face became pale. Damn markings were like my helmet. So I contacted the seller again. he confirmed that he was in the Fx business and the helmet he sold me (the only one he had) made it out the backdoor in the early 90s pulled from an original helmet they were working on. he also had a Battlestar Galactica Cylon helmet which he kept for himself. Oh, boy, that's when it struck me. The dents, scratches holes were basically from the layered paint from the original helmet. So would I have left the helmet as is it would have been like the Lava helmet. Now it's still pulled from the original helmet and has the correct proportions, with the markings reproduced. Seller told me not to worry, that I did what the helmet was intended for, make a very screen accurate copy for someone to wear. Well, that's what it is now.
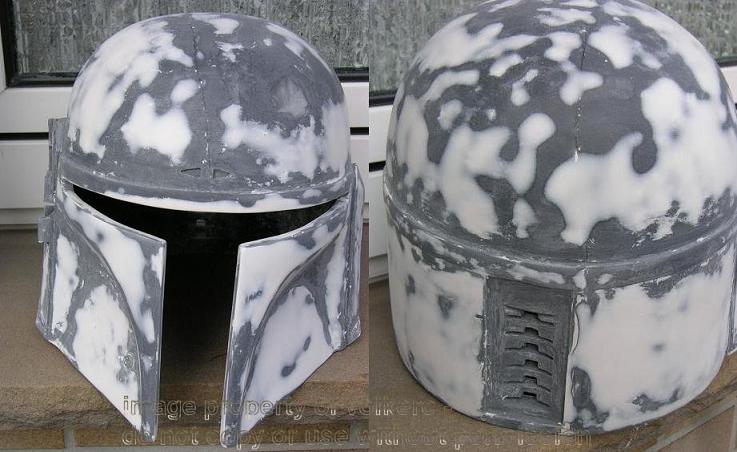
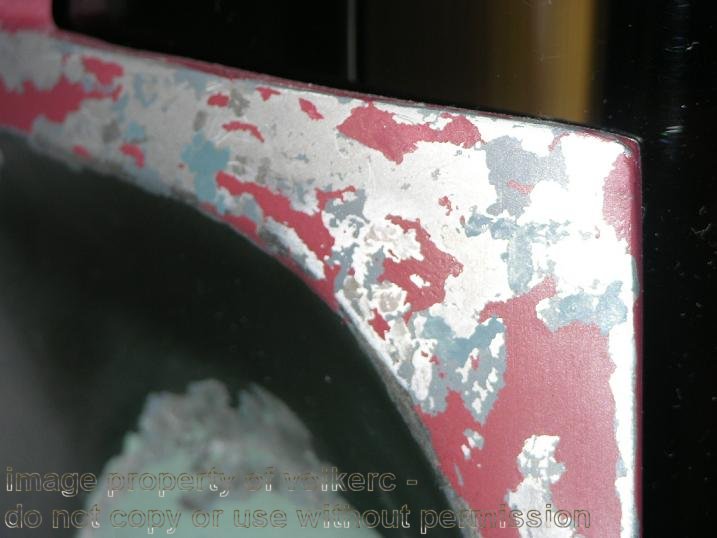
Not a friend of some of the paint suggestions found on the net I decided to take a different route. I entirely mixed the paint myself from these basic colours in the picture. I compared the shades sprayed in different lighting, compared it to the movie lighting, watched the movie over and over, airbrushed samples over samples, went to see the exhibition in brussels before I was happy with the results. Now depending on the lighting the finished costume comes as close as possible to the real deal. The helmet received a layered paintjob, meaning the base started out as silver chrome and the other colors were added on top and scratches and so on taped off. Then pulled off to show the layer beneath.
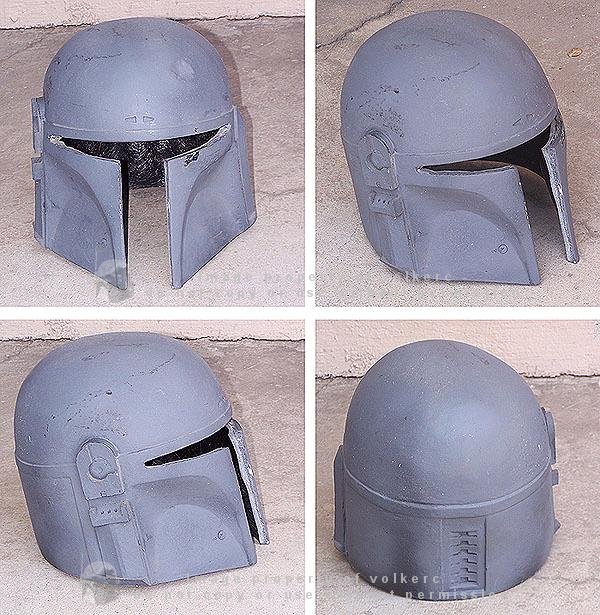
So now that I had a painted fiberglass bucket I researched what else was needed. And even for just a helmet quite some stuff had to be found and installed. I tried to be as accurate as possible trying to locate the stuff they used on the originals based on the TDH research. Whenever possible I preferred the real stuff instead of just making up something. So in the coming posts you'll see my creation mixed with the real stuff.
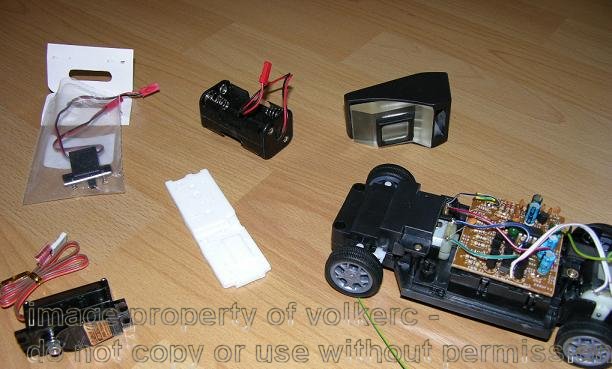
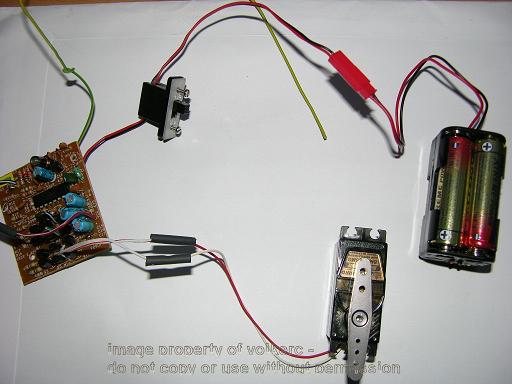
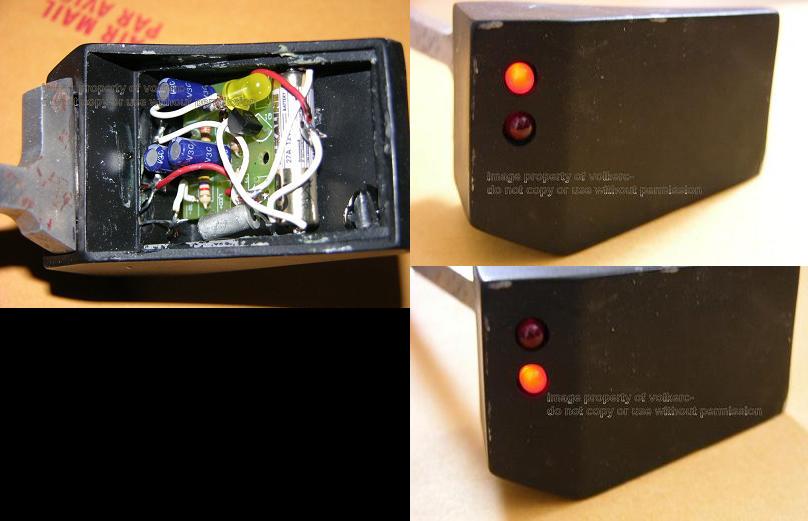
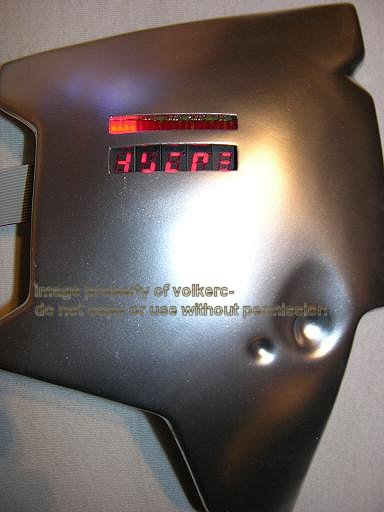
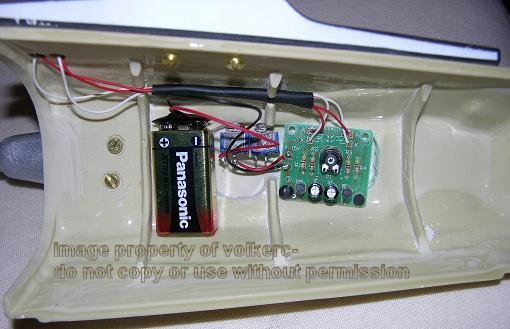
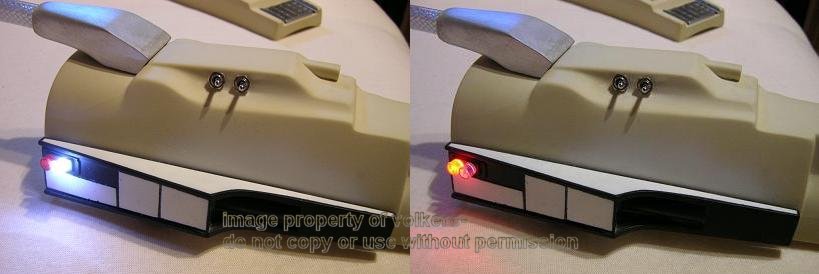
The Boba Fett helmet used a rangefinder stalk that was motorized to go up and down, 2 red light up LED's in the front and a white led in the back to light up the little screen.
I used parts of a modelcar as a receiver and sender to remotely move up and down the stalk. The stalk is made of aluminum. Once the stalk goes down a quicksilver switch activates the LED's. Stalk goes up, Led's turn off.
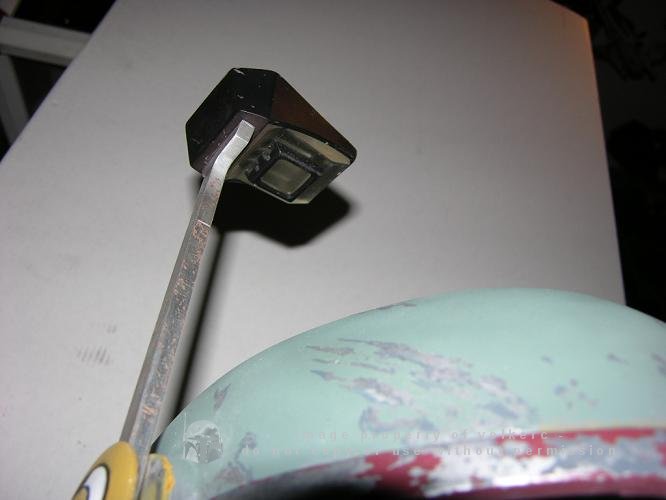
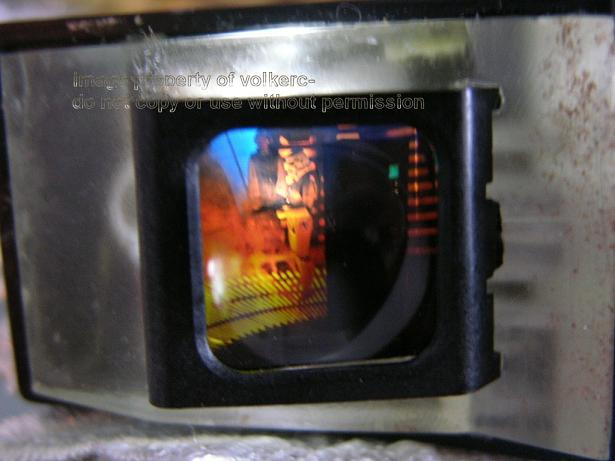
To spicen up the rangefinder I used a Hasbro freeze frame of Han in carbonite cut it to size and put it behind the camera part which is a found part and came off a Polaroid SX-70 view finder. So when the stalk goes down the Led lights up the image from behind. The original used a freeze frame of a riot type scene.
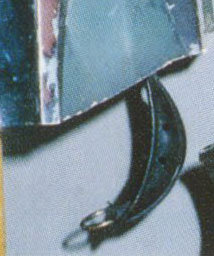
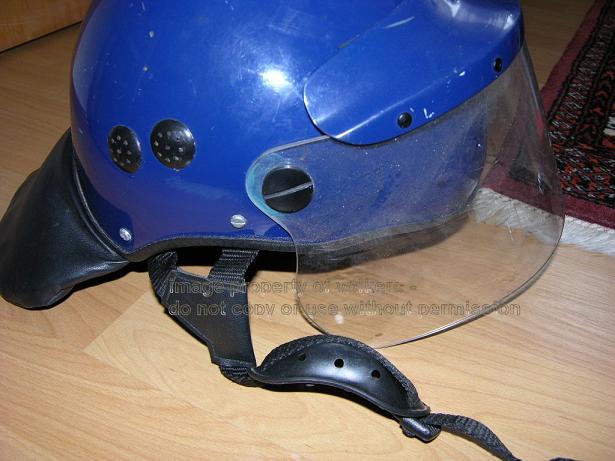
The movie used helmet used a chin cup of a 70's british police riot helmet.
I was able to locate an original riot helmet in the U.K. to get the screen accurate cup.
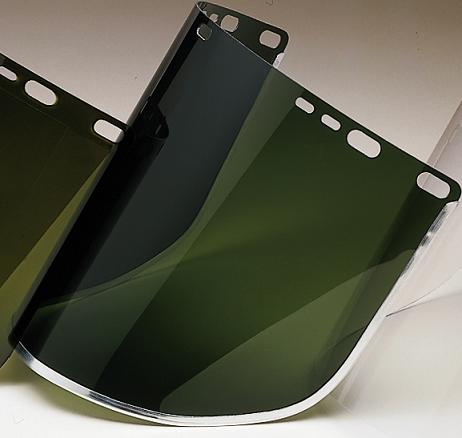
As far as the visor is concerned. They used a thin welding helmet visor in dark green, which I also obtained.
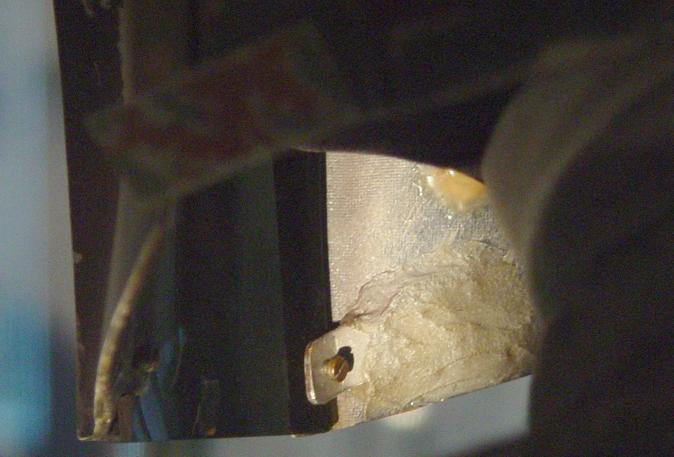
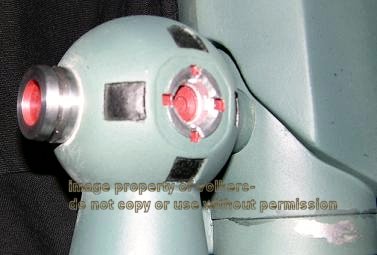
I tried to copy the mounting hardware as much as possible. First up the Original
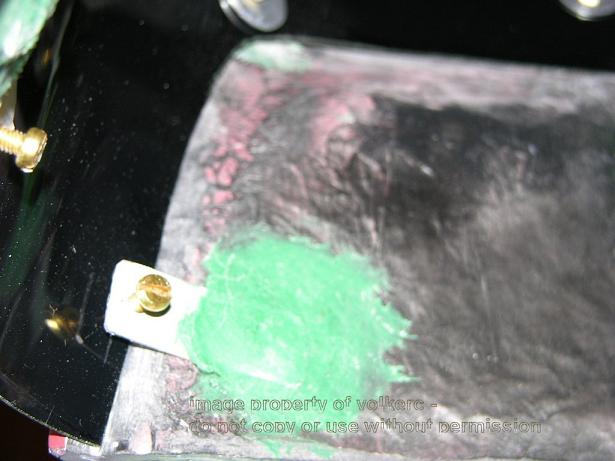
My version
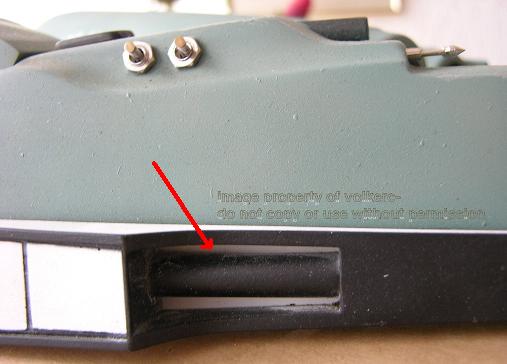
Another found part used was the Borden connector, which is a dental piece, used by dentists. Cut to specs and installed in the right cheek it looks like this:
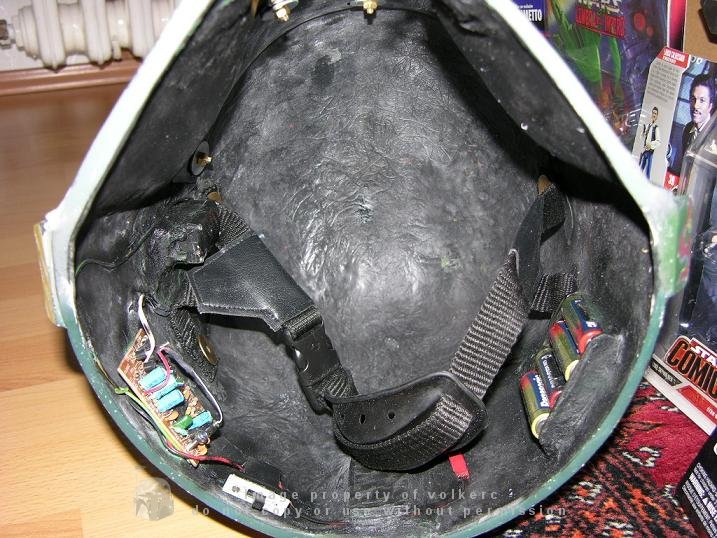
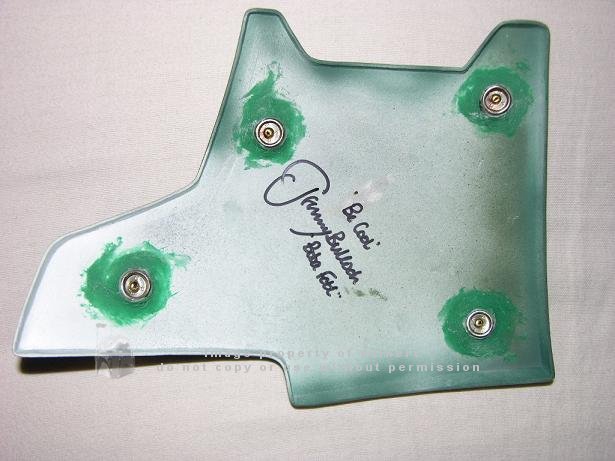
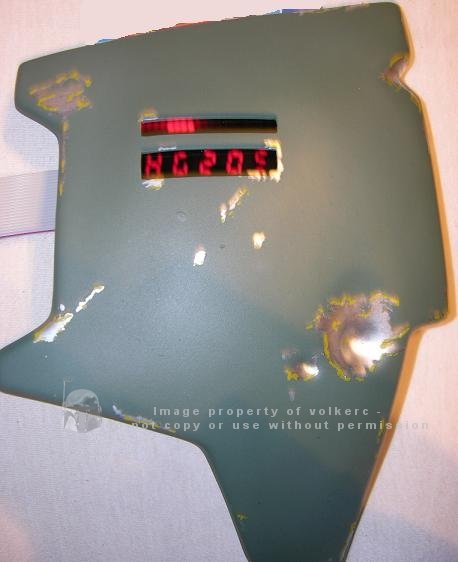
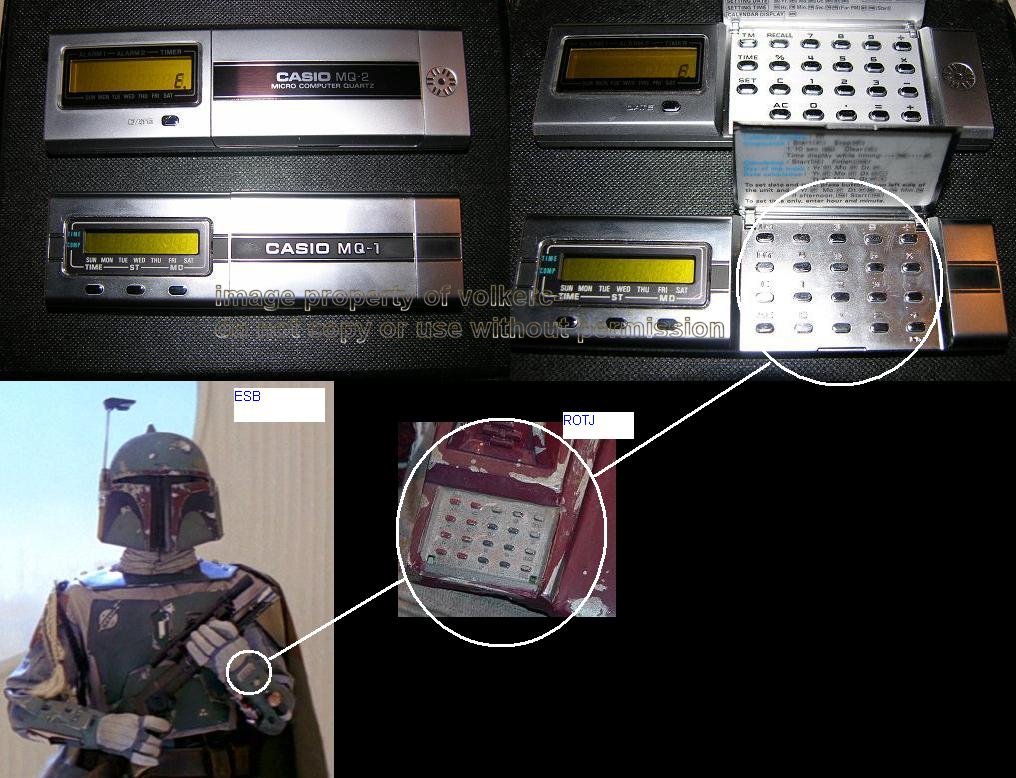
Behind the vents in the back goes a plate of another found part, the Casio Mq1 calculator.
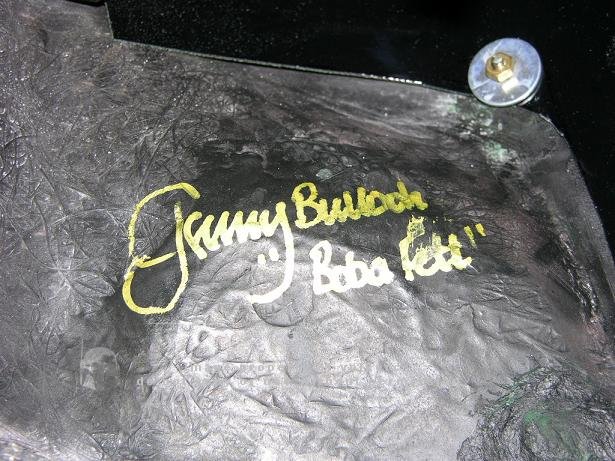
The inside of the helmet was later signed by Actor Jeremy Bulloch in Duesseldorf
So I had my helmet, but no cool cabinet. One day I came across a decent priced lifesize store mannaquin, bought it and placed the helmet on it.
Now looking at it everyday like this, another thought shot through my mind, wouldn't it be cool to have a real life size Boba standing there instead of just a helmet on a naked mannaquin? Can't be that difficult?
So next was a suit made by Bobamaker which I got off the Cargo Hold from the TDH. Bobamaker is one of the great Propmakers when it comes to Fett parts needed for your costume. This one is nicely colored, very durable and it was weathered a bit more by myself.
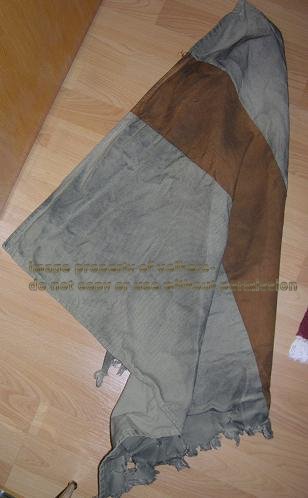
The Neckseal and the cape came from TK409
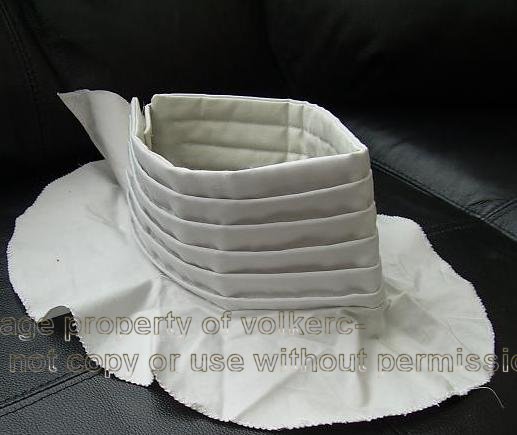
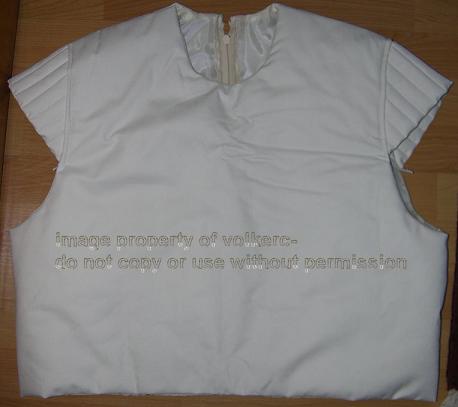
The flakvest was again Bobamaker
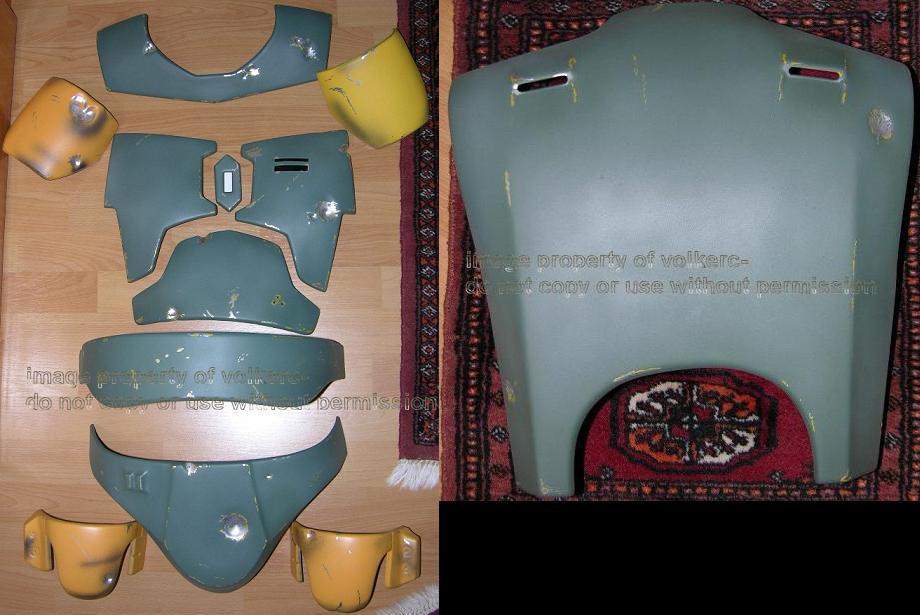
The Body Armor came from Fettpride another great propmaker who stands for accuracy and great products. This set was one of his revised units which also became part of the costume Jeremy Bulloch now owns. The Armor received also a layered paint job. Again, all colors are mixed and matched by myself using the same technique as described with the helmet build.
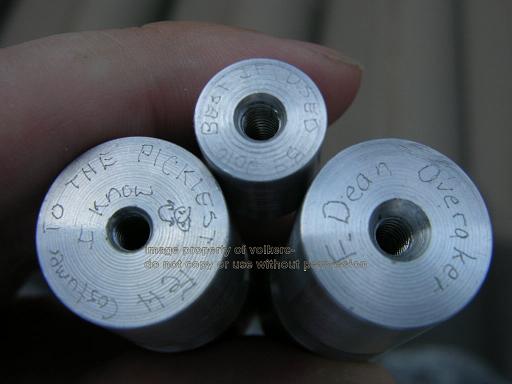
The knee darts came from DeanO, another guarantee for accuracy.
I had Jeremy Bulloch sign on the back of one chest plate. You can also see that I used pushbuttons to mount the chest armor pieces.
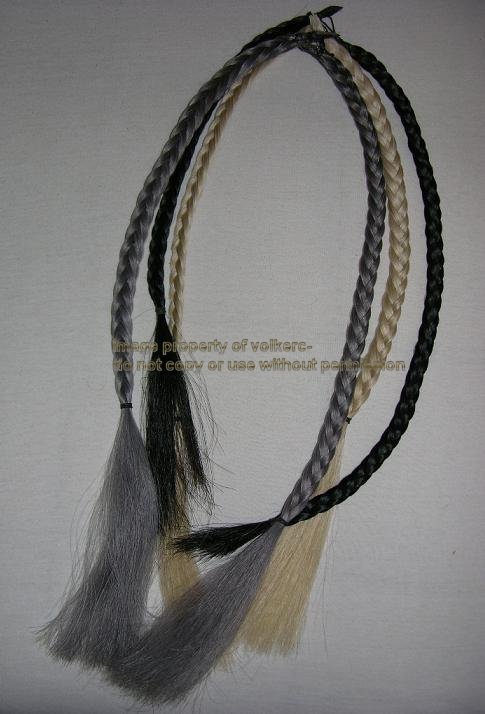
The Wookie braids are made of real horsehair in correct ESB color and were made by Julie from the TDH
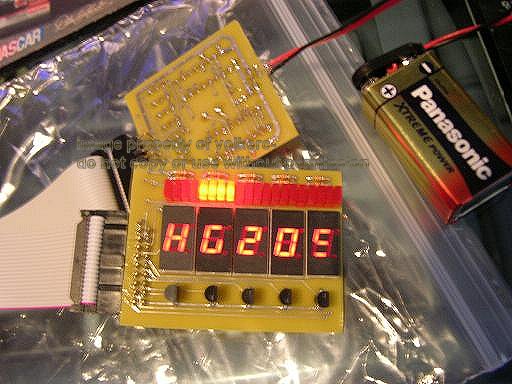
So far so good. The upper body part was almost done, but wait, there is more. Boba has the lighted chest plate, all those Led's and numbers on his left chest plate had to go in. Picked no one else but Shackmans lights. he's the one who makes the best. The upper leds are multiple single led's that light up in sections of four at once. Below are the numbers that light up in a special sequence. This again is as close to screen accurate as possible.
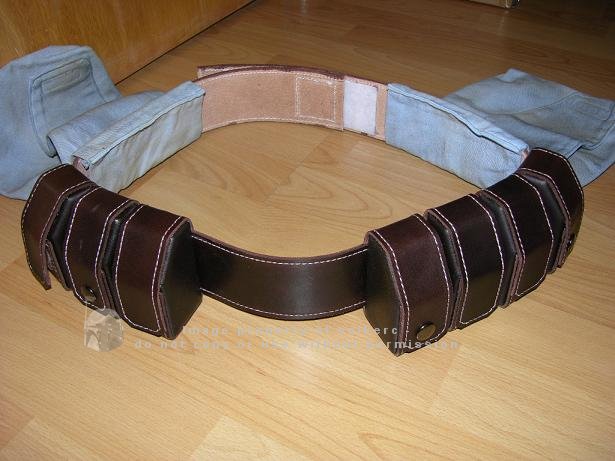
Moving on with easier stuff. I ordered a leather ammo belt from 99centtaco who is well known for his leather work. I asked him however to dye the leather in a certain color which I thought matches the ESB color the best. After a few tries we were both satisfied with the outcome. The cloth pouches came again from Bobamaker.
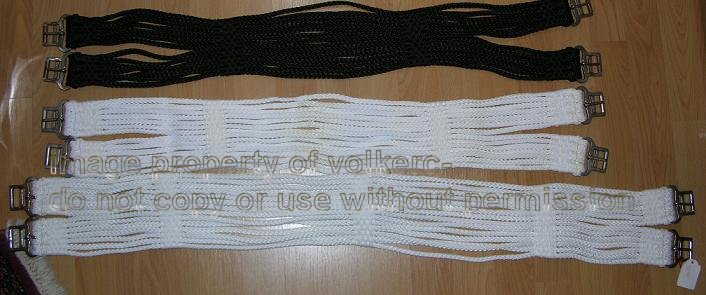
I ordered a few horse girth belts, picked the best one and dyed it to match the ESB color of the costume.
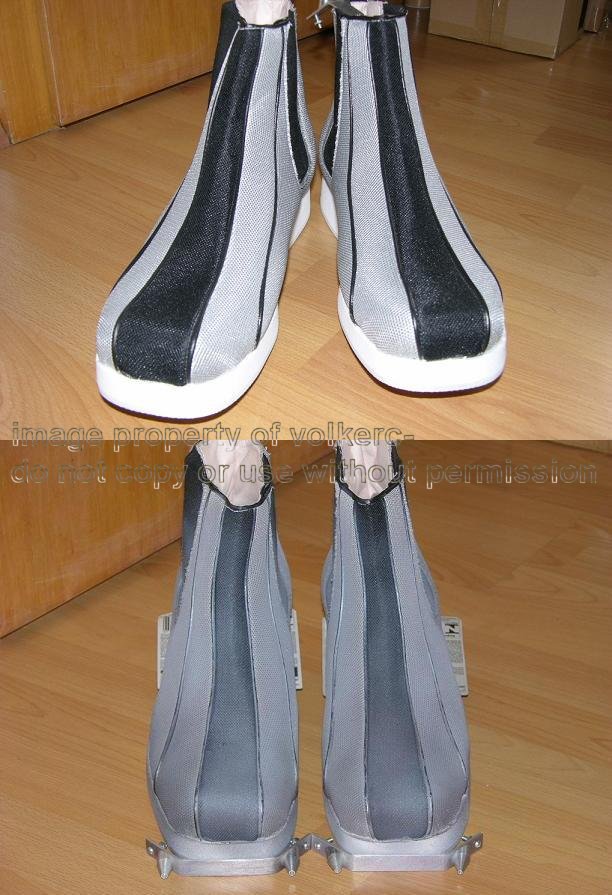
Boots were used from CA Boots and weathered to look more authentic, toe spikes came from fenixprops, looked the best on those boots.
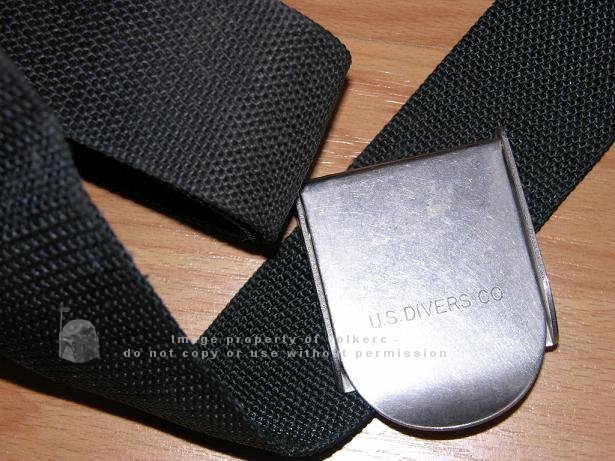
Another found part was used for the costume, a U.S. Diver belt buckle
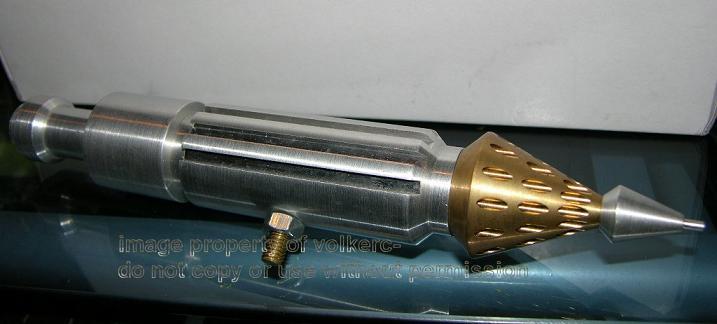
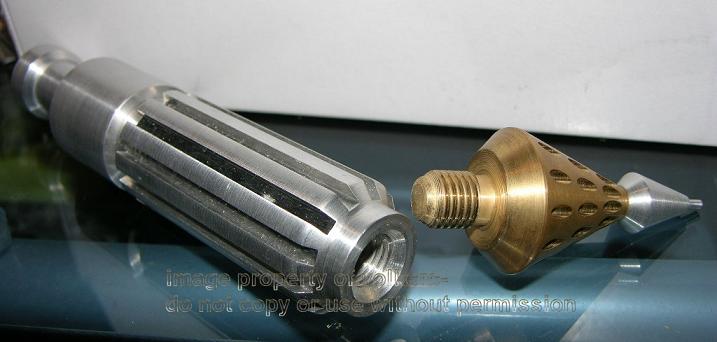
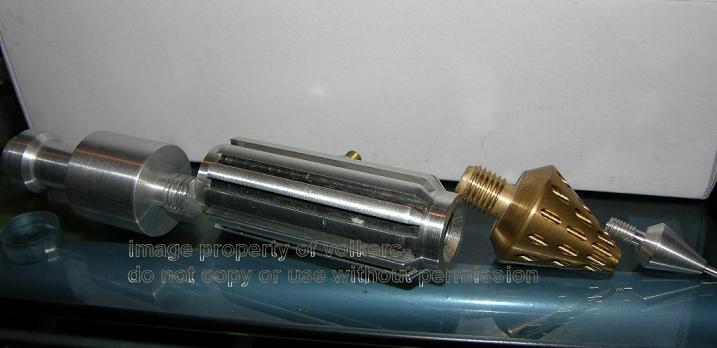
The missile going on the left gauntlet is a machined piece made by russrep. Can't get much nicer than that.
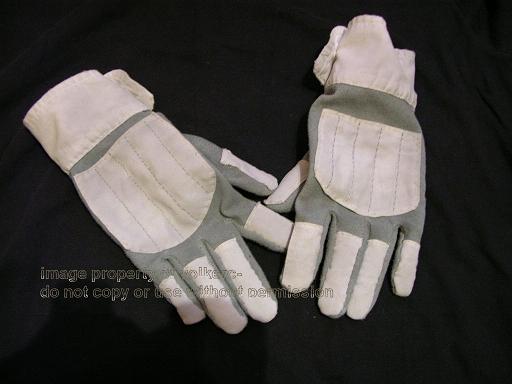
Gloves. Fetts costume gloves were made of parade gloves for the original. So I bought some parade gloves, dyed them and sew the cloth pieces on them.
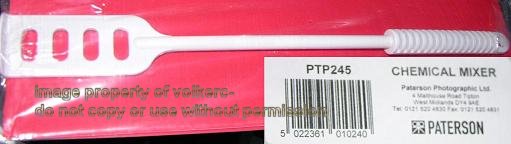
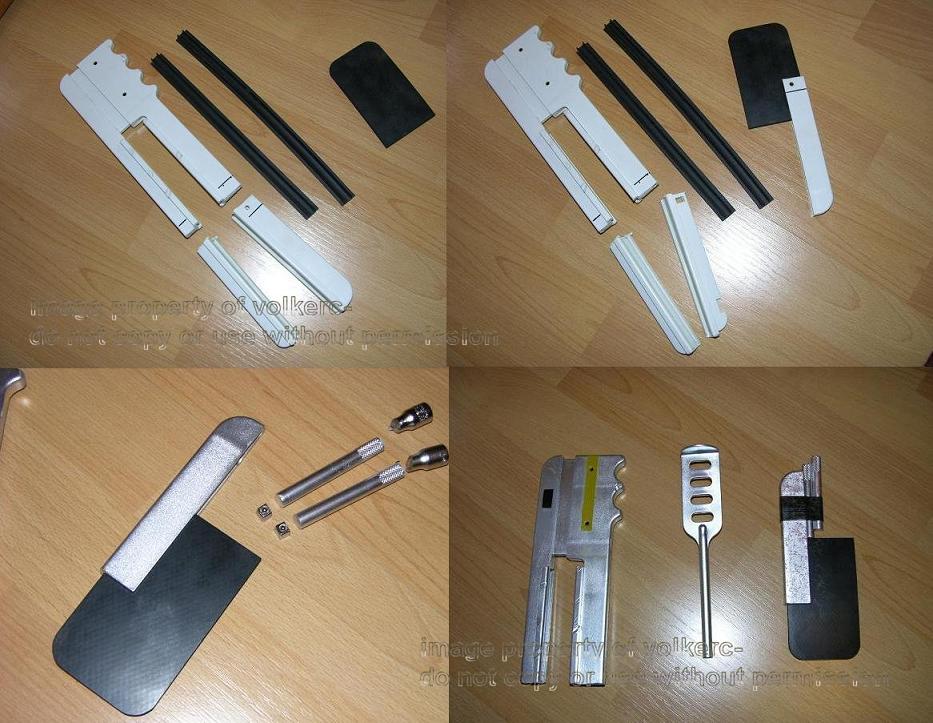
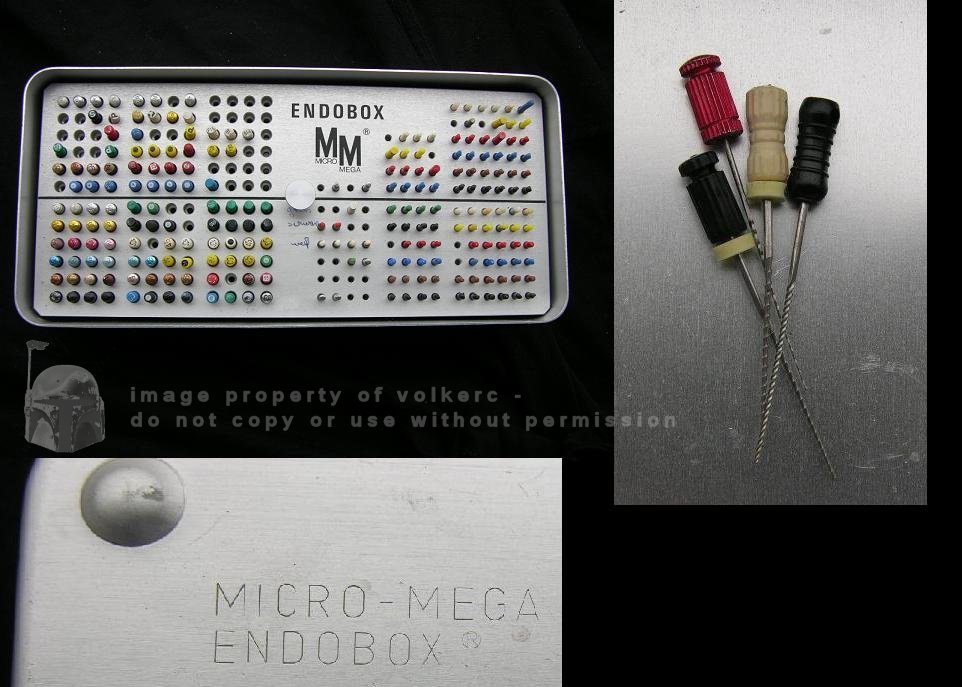
Shin Tools. Some of the shin tools were made of Paterson photo equipment. The stirrer was used for the "knife". The Paterson Squeegee was another tool. Leftovers of the Squeegee were used for tool number 3, as well as parts of a turntable. Not having found the turntable parts yet i used ratched extensions with the same look. The Paterson pieces are found parts, originals. The 4th shintool is still a mystery. Some say it could be amicrophone, some say a photo equipment piece.
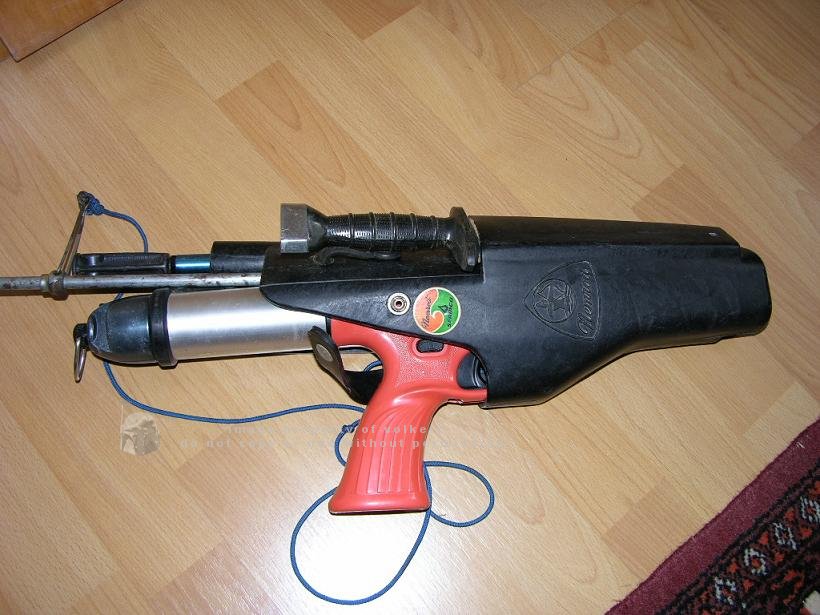
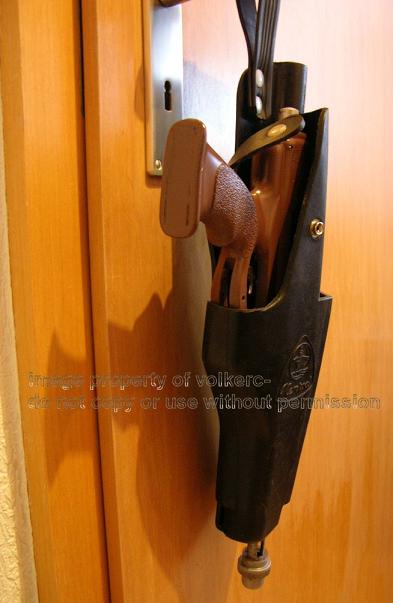
Holster. The ESB Fett uses a Holster for his sidearm. The holster used on the costume came from a Nemrod Clipper speargun. I was able to locate a complete set, holster, speargun and knife, so the holster another found part was used for the costume. Some manufacture replica holsters. I prefer the real deal. The same holster was also used for the Bespin Guards.
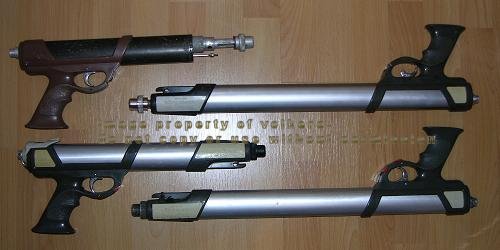
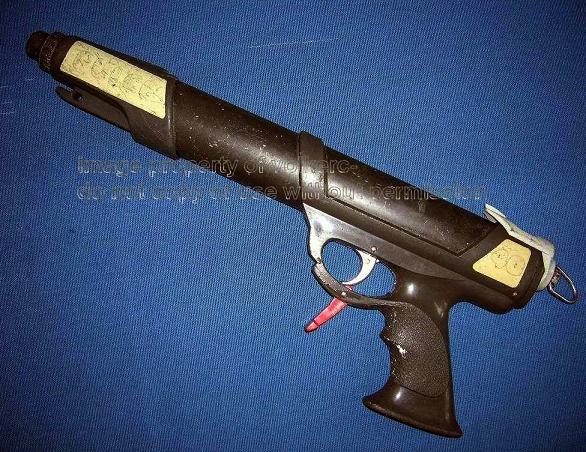
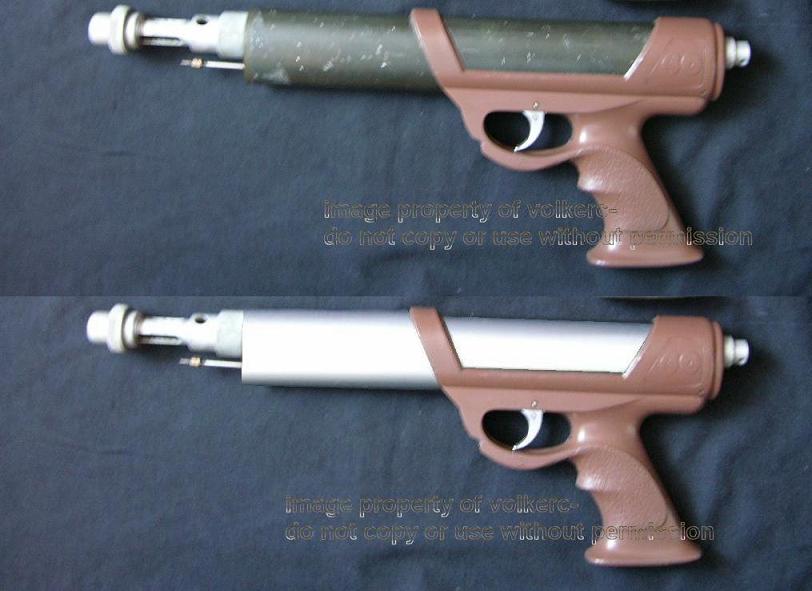
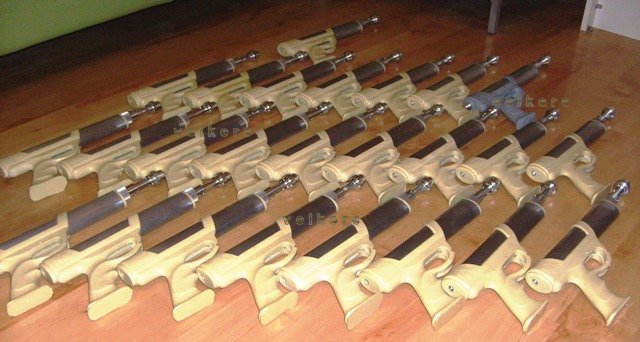
The sidearm. The real sidearm used was still a mistery, but it was discovered that the sidearm used was a Technisub Pulce 40 speargun. So I searched the web and found a few of them. There is also a Pulce 60 which has a longer barrel. The 40 comes with a silver barrel or a black/dark green barrel. Because Fett never pulled the sidearm we don't know what the color of the barrel is. There is a possibility it is silver, or black, or 3rd option, Lfl gave it a total different color than one of the original barrels. None of the toys to date copied the correct sidearm yet. They all use an old Kotobukiya style pistol in brown and silver, where only the brown color is correct, not the handle or the rest. I decided to only paint the handle in the correct color and I use the black barrel on mine, but can also switch to silver if need be.
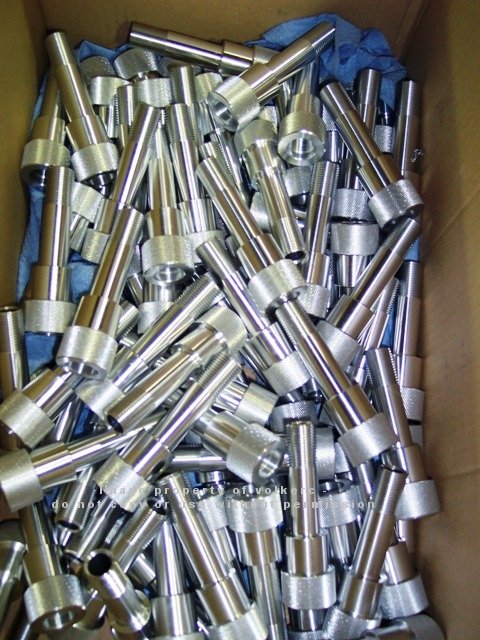
And because the real deal was so hard to find and prices became ridicolous a propmaker in the U.K. Mojofett asked me to do a run of copies of my Pulce to make them affordable for other cos players. So decided to ship my original so he could make copies out of resin and aluminum. These came out top notch and the run certainly helped others to get a better Fett costume.
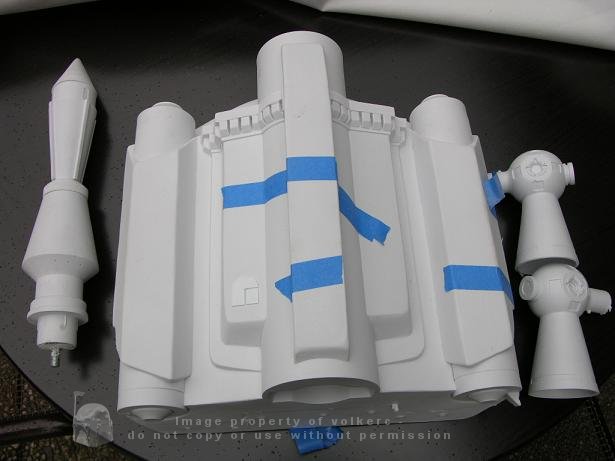
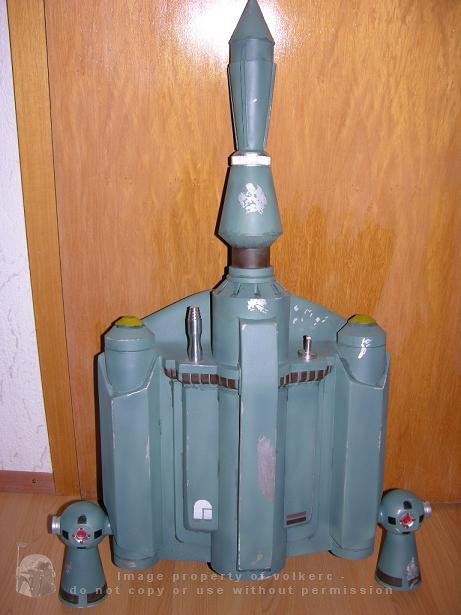
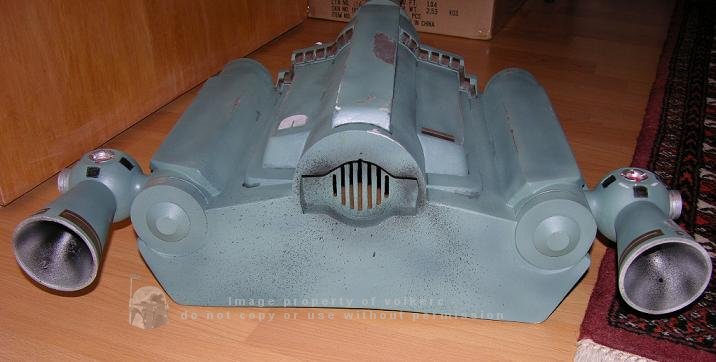
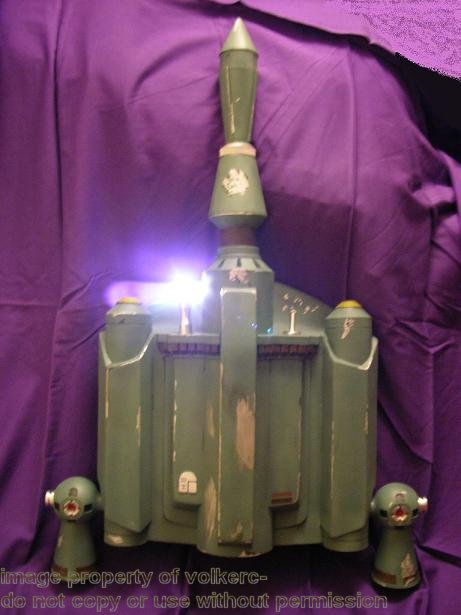
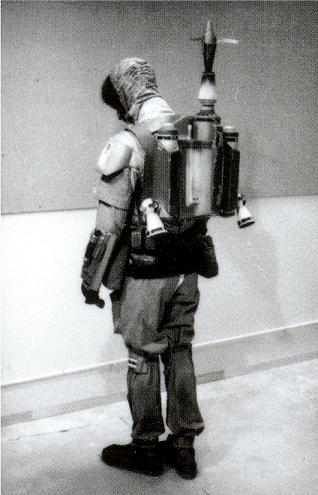
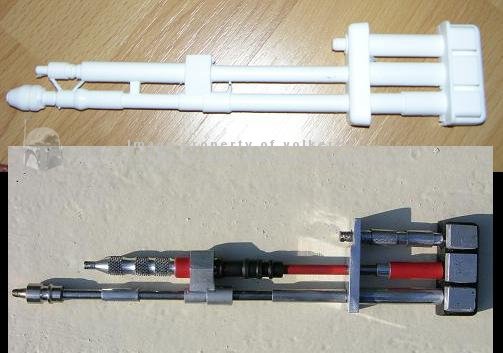
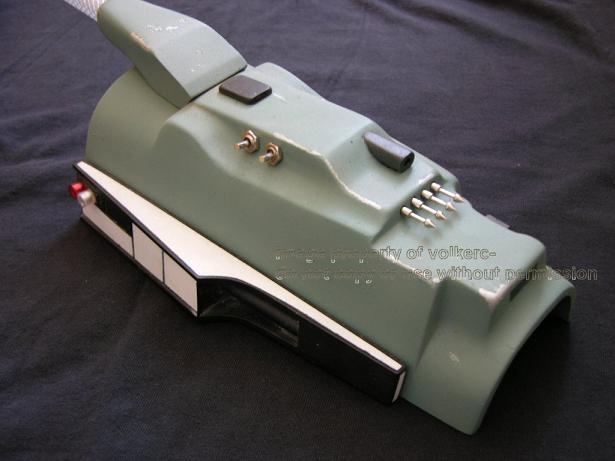
Jetpack. The jetpack came from another member of the TDH, Man of war studios. I was able to get on the run for the same jetpack Jeremy Bulloch got for his costume. Another top notch piece from MOW. Received a layered paint job as well. The proper aluminum pieces on the back were added. The small piece comes from a mitchell turntable. Shown in the small pic is the one with the thicker base, which was used for the Prototype Uzi Blaster. The small base, mounted on the jetpack is the correct found item. The longer aluminum piece is a machined item and it is lighted. Later on the aluminum pieces for the side thrusters were also added.
There is still an upgrade pending. The rocket needs to be replaced with a machined aluminum one. The rocket comes with 3 blades that open up, the MOW jetpack has 4 blade dummies and they are fixed, just molded. I want it functional. Have the plans, need a machinist.
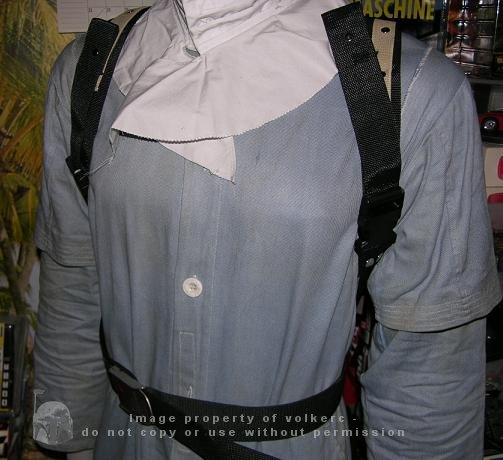
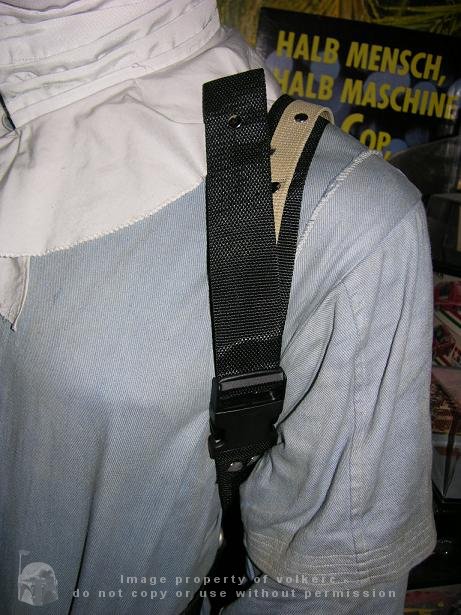
The harness for the jetpack was crafted by myself. The system was copied from images found on the web. The steel piece on the back was welded by myself again, trying to copy the original. The original is to be believed coming from a firefighter part or scuba part. That's the area of the costum where the U.S. divers belt buckle is used for. System comes with easy adjustable straps that can be adjusted by myself without taking off half of the costume. Quite comfy. The harness is covered by the flakvest.
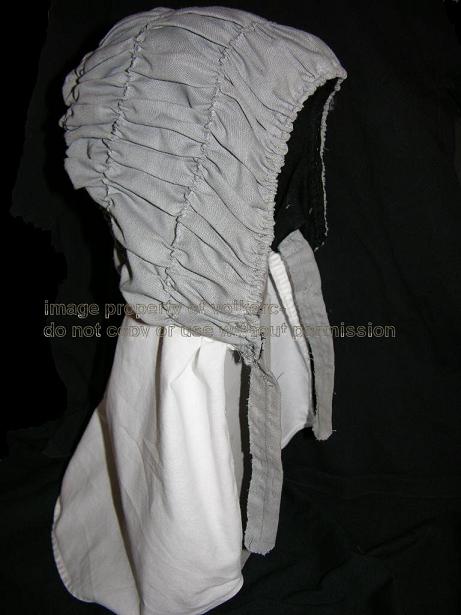
Balaclava. Even though that piece won't get noticed under the helmet I also tried to be accurate here. Bought one that looked similar to the original and modified it with an inner liner, extended it to go under the flak vest to get the proper look out of it.
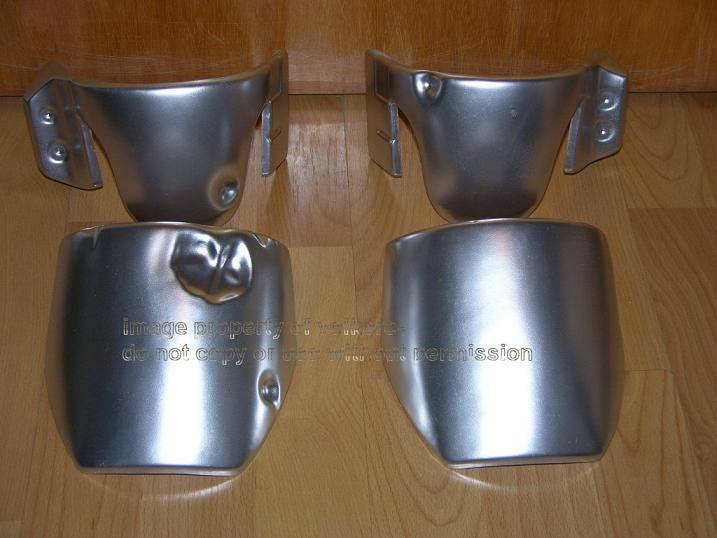
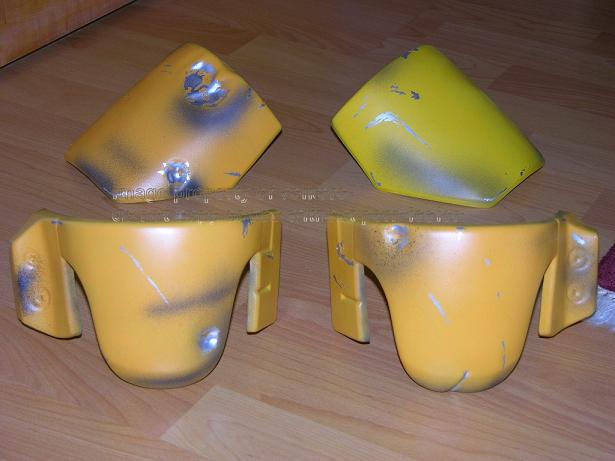
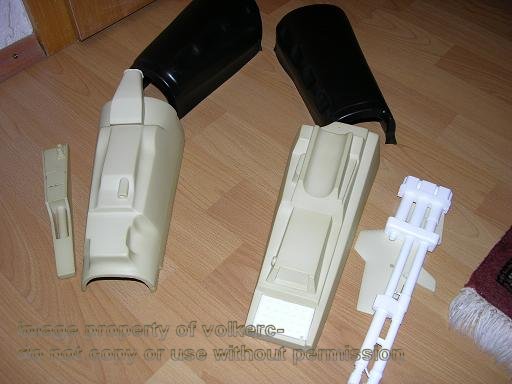
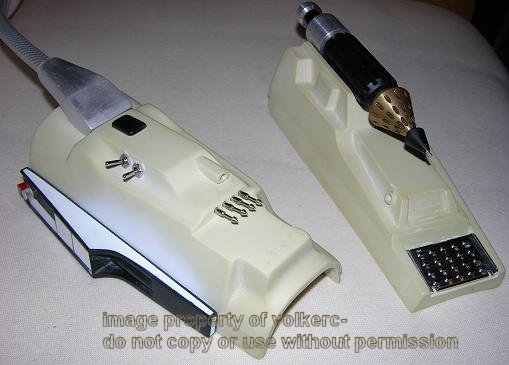
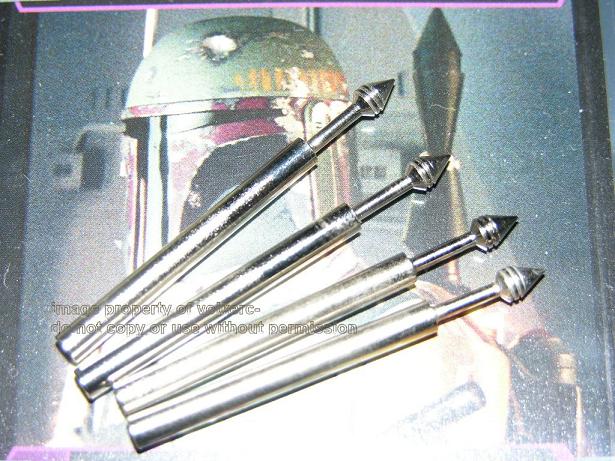
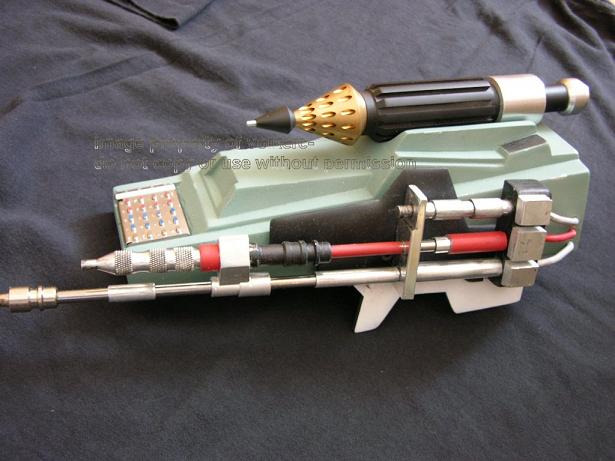
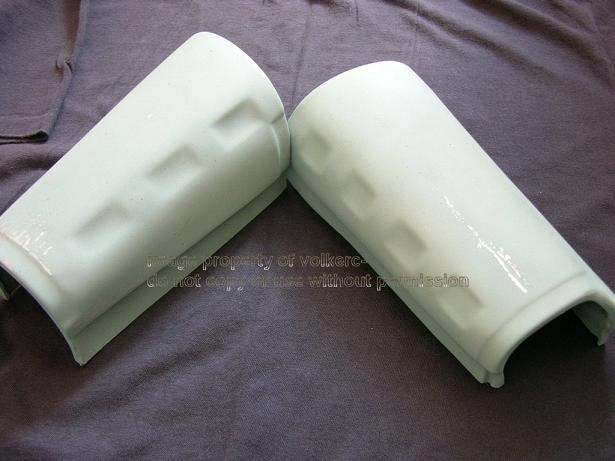
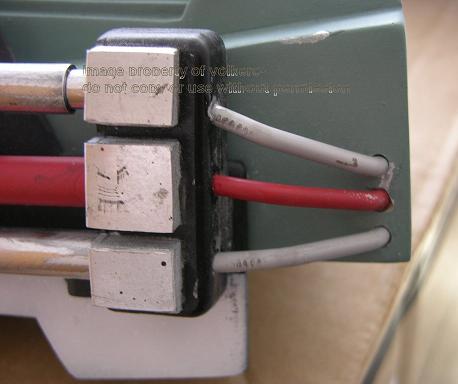
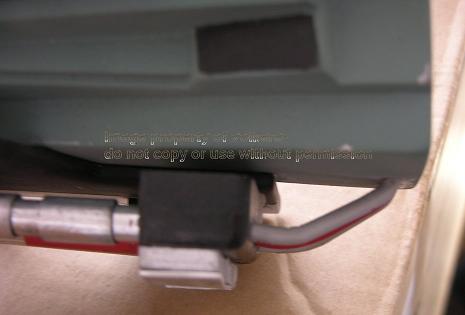
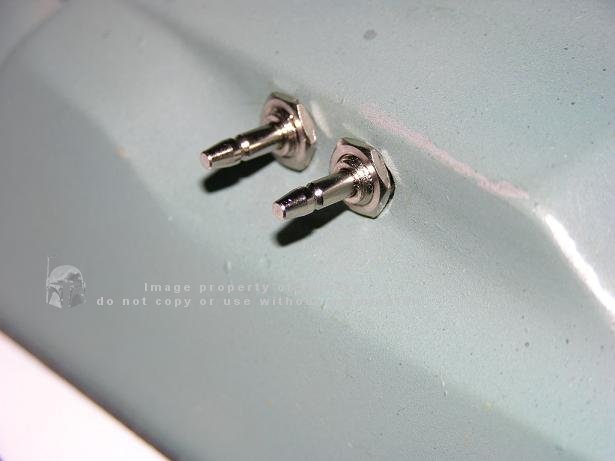
Gauntlets. The gauntlets came again from Man of War studios. Same as the ones used on Jeremy Bullochs costume. Top part is resin, lower parts vacuumformed plastics, as the originals. Chosen cause they are very accurate. A lot of work went into them. From the layered paintjob to all the add ons. The 4 darts came once again from Mitchell turntables, those are found parts, all 4 of them, rocket was mentioned earlier, the correct two switches, also found parts were added later in the build, the flame thrower cast part was replaced by a self made construction out of aluminum, steel and plastic parts, with the piping I found in pics. The right gauntlet received 2 led's which turned out later were incorrect, as the real costume just used dummies in form of dentist files. Those were located later and are also in my collection of found parts. For the right gauntlet there was also a flashlight used, which still need to be added to my gauntlet. The same goes for a dentist screw for the left gauntlet. The buttons on the left gauntlet are found parts, functional and came of the Casio Mq-1 calculator.